Search

Monday
Apr142014

HOW TO COOK THE PERFECT HARD-BOILED EGG FOR DEVILED EGGS

HOW TO MAKE THE BEST HARD-BOILED EGG FOR DEVILED EGGS AND HOW TO COOK THEM SO THEY PEEL EASILY: TIPS FROM FOOD NETWORK, ALTON BROWN, JACQUES PEPIN AND MORE...

Easter is the unofficial kick-off of deviled egg season because after Easter come picnics, outings at the lake and all of those backyard BBQ’s where deviled eggs always make an appearance on the menu. Here’s my question… are all hard-boiled eggs created equal?  
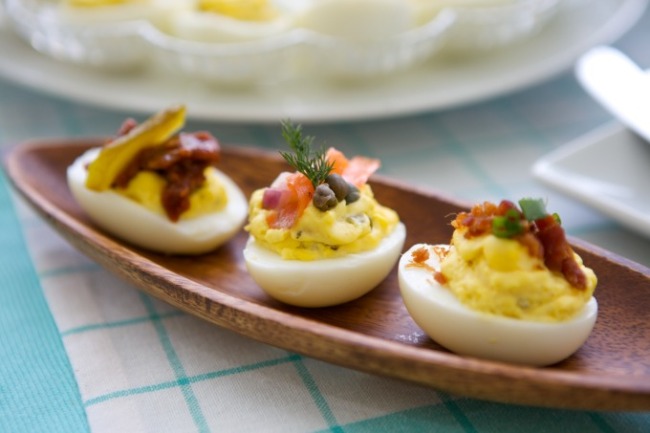
I’ve seen lots of posts on social media in the past days discussing how to make a perfect hard-boiled egg. None of them are the same. Most are similar but they all have their own twist or timing.

I’ve been cooking hard-boiled eggs the same way for so many years and always thought my way was the only way. Today, I decided to do a hard-boiled egg study from some of the more prominent offerings on the Internet to see which hard-boiled egg is the best egg for those yummy deviled eggs we cannot wait to eat on Easter Sunday.

I compared hard-boiled egg cooking instructions from Julia Child, Alton Brown, Food Network, the Deen family, and the old school method of adding vinegar to the water to my own tried and true hard-boiled egg method. I also watched videos from Jacques Pepin and Food & Wine. The test was based on three criteria: texture of white, texture of yolk and ease of peeling. DISCLAIMER: This was not a blind taste test as I was the only person in the kitchen.

HERE'S WHAT I FOUND OUT: TIPS FOR COOKING THE PERFECT HARD-BOILED EGG

  • Farm eggs are harder to peel after boiling. Save your farm eggs for baking or ice cream. Fresh eggs from the store have thinner membranes which do peel easier so hard-boil super fresh eggs.
  • Do not cram too many eggs into a pot. You want to cover the eggs with one inch of water and leave room in the pot so you can stir the eggs around as they cook.
  • Stirring the eggs occasionally during the cooking process helps yolks stay centered and the whites have two sides which are equally thick; better for stuffing and not lopsided.
  • Use room temperature eggs and water or cold water and cold eggs. The result is about the same but eggs will crack more often if you add cold eggs to hot water.
  • You can peel the eggs easier if you run them under cool water or put them in an ice bath for 2-3 minutes only. Alton suggests 5 minutes in the ice bath but those were slightly harder to peel. I prefer to quickly rinse in cool water just until you can handle them. Crack and put back in the water; peel quickly by popping the large end with the air pocket on the counter-it seems to make the peel come off in larger pieces.
  • Some people suggest rolling the egg on the counter using the palm of your hand to crack the peel but I found all of those little pieces harder to peel. I used to do this but now prefer the "pop the air pocket" method.
  • Adding salt, vinegar or baking soda in the water does not make the peeling process easier and when you boil the eggs with vinegar, the whole house stinks.
  • The egg whites will become tough and rubbery if you cook more than the recommended time- you will not want to eat rubbery eggs ever again once you’ve had a properly cooked egg.
  • The ucky green ring around the outside is truly caused by overcooking and no other reason. The longer you cook the egg, the darker that outer ring becomes. Watch the Jacques Pepin video- he talks about this.
  • A soft or medium boiled egg yolk does not work as well for deviled eggs. The yolk was a little gummy when mixed with mayonnaise, etc. for the filling. However, the medium boiled egg (Alton Brown’s egg) was very delicious with just salt and pepper.

THE RESULTS

The Food Network method for hard-boiled eggs seemed to work the best because they peeled easier and had a better texture than the other versions but only slightly better than my own method. The instructions did not say how long to keep the egg in the ice bath so I left it in for 2 minutes. Follow the cooking instructions for the hard-boiled egg if you want to make deviled eggs. Here's the link...

My own cooking method worked just fine… tried and true. It was the runner-up to the Food Network method, but only because their method did peel slightly easier. Here's what I do:

Start with cold eggs; add cold water to the pot, covering eggs by one inch. Stirring the water occasionally, bring the water to a boil. Reduce the heat to low. Boil on low for one minute. Remove from the heat and let the eggs stand for 14 minutes, stirring from time to time. Immediately rinse in cold water until the eggs are just cool enough to handle. Pop each one- the larger side where the air pocket is- on the counter and put back in the water, working quickly to peel the eggs while they are still warm. Here's my deviled egg recipe. You'll love it.

Alton Brown’s method for hard-boiled eggs resulted in a medium/slightly undercooked yolk which tasted good but were not great for making deviled eggs. I could not find a link online but here's what Alton said about hard-boiled eggs on Twitter...
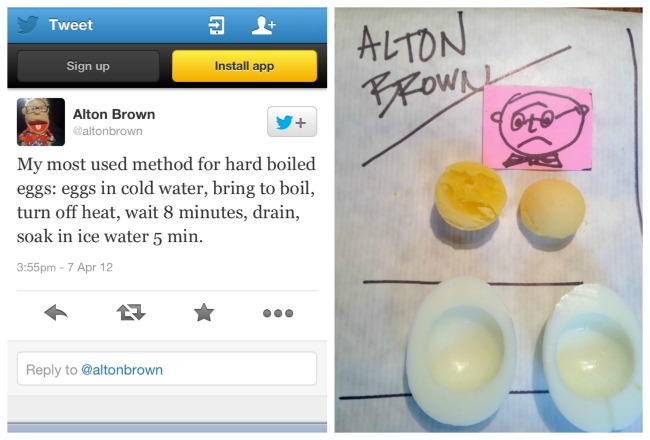
THIS JUST IN: ALTON BROWN'S GONE CRAY-CRAY. His words, not mine. Just hours after I posted this comparison, my former mentor as upped the ante and posted a game-changer... he's now suggesting that baking the eggs in the oven is more reliable and easier than "the harsh enviornment of a pot of boiling water" - SO I had to test that for myself. I found the technique to be more difficult as I had two escapee eggs jump off the towel and onto my floor. However, the result is equally delicious as his boiled version above but again, a little underdone for my preference for hard-boiled eggs for stuffing. Maybe they should cook just a little longer. Here's his new video with the baked version:

The method described by Jamie Deenin his video had the worst result. They tasted fine but were harder to peel and egg white came away with the peel creating big “potholes” in the egg white; pretty unattractive for deviled eggs. So many people looked at the video today that they crashed the site. I'll add a link for you to see it later but basically Jamie said to bring the room temperature eggs to a boil in salted water. Remove from the heat and add a lid and wait 13 minutes. Put in an ice bath. Here's a link to Paula's site with their own test kitchen results. Read more... Paula's method is the same as Jamie's but she lets the eggs sit for 20 minutes which I found way too long and produced rubbery egg whites.

The Julia Child hard-boiled egg method took too long compared to the others and didn’t taste better so I scratched it from the test but I do love this video from her former assistant and one of my favorite chefs, the legendary Jacques Pepin. Notice he pricks the egg with a pin before boiling. I did not try that but will just as soon as I get some more eggs.

I did find something completely new when it comes to peeling a hard-boiled egg: using a teaspoon between the membrane skin and the egg as shown in this Food & Wine video from Justin Chapple from their test kitchen. I tried it and found it harder than just peeling it the classic way. Sorry, Justin. What is it with these quirky guys named Justin?

Tomorrow, I’m going to taste test deviled egg recipes from some of my favorite chefs and report back on the results. Stay tuned!


Wednesday
Apr022014

GIRLS NIGHT IN: HOST A DIY CENTERPIECE PARTY!

The nice folks at Seagram's Escapes asked me for some Spring party ideas... here's one I think you'll love!

With Easter just weeks away, I've got a fun (and productive) party idea for your next Girls Night In get-together. Why not host a DIY centerpiece party? Each year, a few weeks before Easter, I get lots of emails and questions about Easter decorations and tablesettings. Here's a party theme that will not only allow you to spend time with your friends, you can go home with a beautiful centerpiece... just in time for your Easter Sunday celebration. It's also a great party plan for that DIY bride or class reunion, too!


THE SET UP

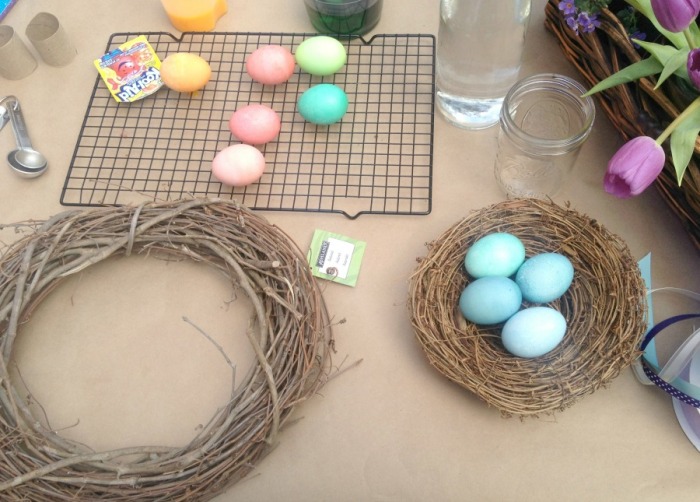
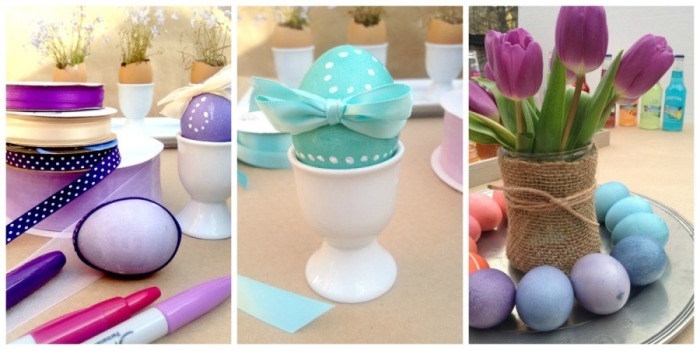
This is a very simple party to host. You provides the drinks, the food, and a large workspace with plenty of room. Guests will bring what they need for her own centerpiece plus tools like floral wire, floral sheers, ribbon, etc. You can all share supplies. Ask guests to email a list of what they are bringing- you may need to make a trip to Michael's, Hobby Lobby or a local floral supply store to pick up the basics if you don't have them. If you are planning this party for the week of Easter, you might also set up a station to dye Easter eggs. That way, you can have eggs already dyed for the kids to decorate.

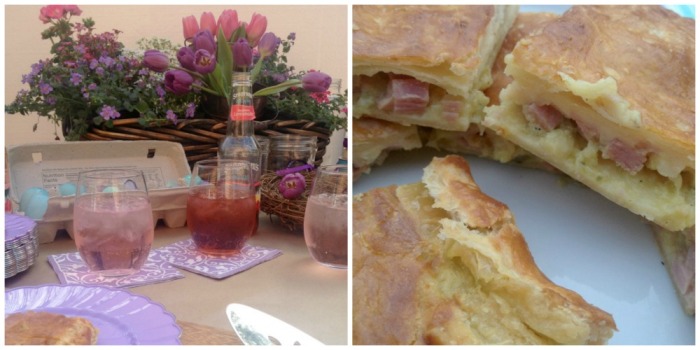
I've been so in love with the purple hues of Spring... inspired by Radiant Orchid, the Pantone color of the year. I used that as the foundation for my color scheme with pretty plates, napkins, straws and flowers in those purple tones to anchor the look. I added a special dessert cocktail in the same color palette to make it really special!

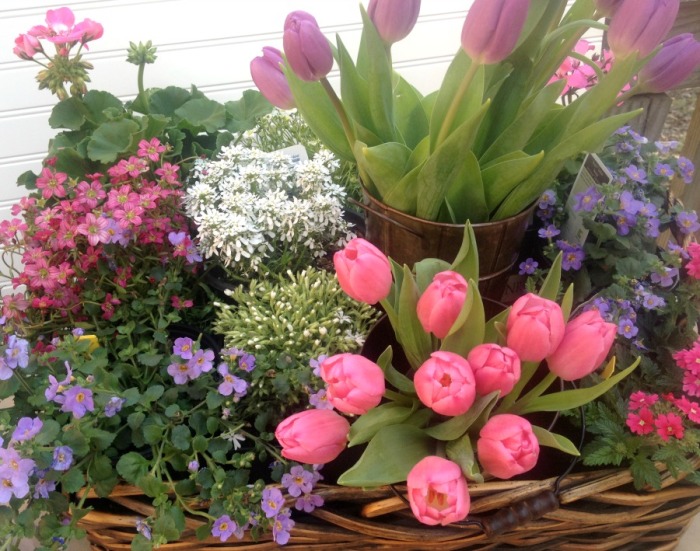
Get annuals or herbs from the garden center in addition to cut flowers. Later you can plant them in the yard and enjoy them all summer long.

In the Spring, I always like to use herbs or flowers from the garden center for my centerpieces... that way, after the party is over, I can plant them in the yard and enjoy them all summer long. I picked up a few bunches of tulips at the store, too. I got a twig wreath and some bird nests at the craft store and found floral foam, wire and twine there also. If you want a rustic look, use Mason jars in several sizes. If you are using metal containers, they tend to leak. To avoid this, fit a small jar or plastic container into the bottom and fill that with water. 

Cover your work space with a plastic backed drop cloth from the home improvement store or use brown craft paper... I used did both to make clean up easy. It is important to use layers of newspaper if you will be dying eggs; they make a mess and the stain is virtually impossible to remove.

Cover your work station with brown craft paper. Twig wreaths, bird nests, and floral supplies can be found craft stores like Michael's and Hobby Lobby.

FOOD & DRINKS

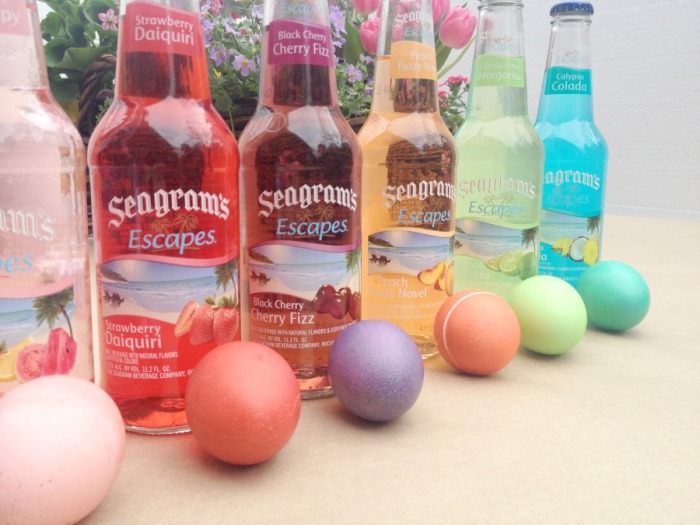
Girls Night is soooo about the cocktails and quality time catching up with friends but since this party is centered around an activity, I wanted to keep the menu very simple and did not want to have to fuss with the bar. Seagram's Escapes were not only the perfect colors for the party, the wide variety of flavors insured there would be something for everyone. Put them on ice and offer some fruit mix-ins; they come in 4-packs or you can find them at Sam's and the big stores in multi-flavor cases; perfect for a party.

Seagram's Escapes are light, fruity fun and the perfect colors for the party theme.

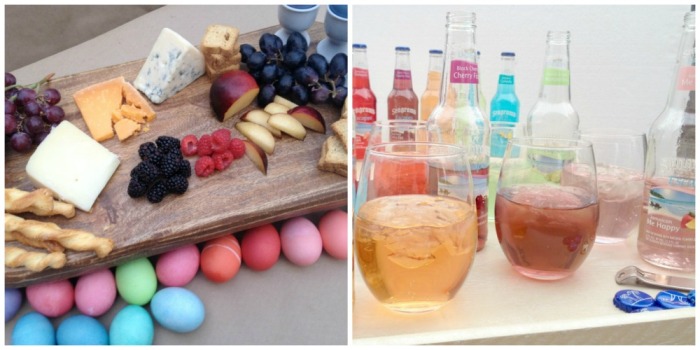
Keep the food simple as well. A cheese board with 3-4 cheeses plus crackers, fruit, honey, jam and other pairings is the perfect way to start the party. It is easy to assemble and there's no cooking required. Make one of your party favorites that is easy to eat standing up or while working. I made Puffy Party Squares because they are easy, fast and inexpensive but also because everyone loves them. Get the recipe... 

And because there has to be something sweet on the menu, I came up with these incredible Very Berry Ice Cream Floats for dessert... again, very simple, no cooking required and completely addictive.

Very Berry Grown Up Ice Cream Floats

Here's the how to:

VERY BERRY ICE CREAM FLOATS

1 small container fresh blackberries or raspberries

1 half gallon container vanilla ice cream

Chambord Liqueur

4 Seagram's Escapes, Black Cherry Fizz flavor, chilled

Chill the glasses in the freezer so they are cold.

Put 3 blackberries or raspberries in the bottom of a glass. Muddle slightly with a wooden spoon to break up the fruit. Add 2-3 scoops of vanilla ice cream. Pour over 1 tablespoon of Chambord liqueur. Fill each glass with the Seagram's Escapes... add a straw and enjoy!

THE ACTIVITY

Making centerpieces and decorating eggs can be as easy or as complex as your time and patience allow. If you look at Pinterest, you can see a million different ideas for every taste and every budget. I'm a big fan of cheap that looks expensive so that's what I was aiming for with my flower arrangement. I also like the idea of repurposing the flowers in the garden or container after the party is over.

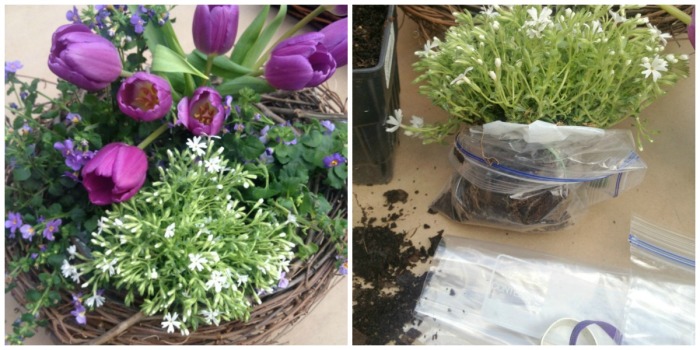
My own style is very relaxed and easy so my centerpieces tend to be rustic and take about 6 minutes to create. When making a centerpiece for a dinner table, I want it to be low so guests can see each other across the table. Here's what I came up with using annuals and one bunch of tulips. After Easter is over, I'll plant the annuals in containers to brighten up my deck this summer. 

Use garden center annuals to create a lasting flower arrangement. Carefully remove the annuals from their plastic container, keeping the root ball intact. Put it into a plastic bag and secure with a rubber band. Use one plastic sandwich bag for each plant. Make sure the soil is damp- but not too wet. Arrange the flowers in a platter, basket, wreath or other short container. Add some fresh cut flowers also for a little height. Done!

This could even be a wonderful family get-together with the cousins or a fun annual neighborhood party. The adults can make flower arrangements and the kids can decorate eggs at a craft station set up with stickers, glitter, glue and other supplies.


REMEMBER TO ALWAYS DRINK RESPONSIBLY AND TO NEVER DRINK AND DRIVE. 

Visit SEAGRAMSESCAPES.COM to find drink recipes, store locations and more. 

Saturday
Mar292014

EASY & AFFORDABLE FOOD FOR A CROWD: MAKE A SPAGHETTI CAKE

Like most people, I love anything with pasta and Parmesan cheese. Add a skillet to the equation and you have something pretty fantastic. Make this for dinner, as a side dish or anytime you have leftover pasta. Perfect party food: easy, cheap and always a crowd favorite. You’ll love it.  

Photo Credit: MartieKnowsParties.com

Skill Level: Easy   Prep Time: 10 minutes

Cook time: 15 minutes


INGREDIENTS


1 teaspoon plus 1 tablespoon olive oil

1 clove garlic, smashed

12 ounces angel hair pasta, cooked until al dente and drained

3 eggs

1 ½ cups Parmesan cheese, grated

1 teaspoon kosher salt

¼ teaspoon black pepper

¼ teaspoon red pepper flakes

Cook the pasta according to package directions but just shy of done. You want it to be al dente. Drain. Toss with ½ teaspoon olive oil.Put the eggs in a large bowl and whisk them with salt, pepper and the garlic. Add the pasta and the cheese. Toss to coat. You want this to be slightly soupy. If it isn't, add some heavy cream or milk.

Put  olive oil in a cast iron or oven-proof skillet over medium high heat. When it gets hot, add the smashed garlic clove and let it cook 1-2 minutes but don’t let it burn. Remove from heat. Use the back of a knife to turn the garlic clove into a paste. Mix it into the pasta.

Turn the heat down to medium. Carefully spin the hot skillet to distribute the olive oil. Pour the pasta mixture into the hot pan. Let it cook 3 minutes or until browned. Flip the cake and brown the other side. The cake is done when the eggs are set.

Serve with more grated Parmesan cheese and grated Italian parsley.

Friday
Mar212014

FOUR FAVORITES: FOUR COCKTAILS TO TRY TONIGHT

Ready to get out of the office and start the weekend? I don't know about you but I'm sooo past ready for this weekend. Here's a few of my favorite springtime cocktail recipes that are tried and true. Stop on the way home and pick up the ingredients, along with a nice steak or maybe a piece of fish and get the weekend started right. Cheers to Friday!

HERE ARE FOUR OF MY FAVORITE COCKTAIL RECIPES TO TRY THIS WEEKEND!

1. MINT JULEP 2. POMEGRANATE MOJITO 3. SANGRIA 4. MOSCOW MULE

1. MARTIE'S MINT JULEP

Use mint infused simple syrup and this drink just feels like Spring. A Kentucky Derby favorite, it is a signature Southern cocktail known around the world. Get the recipe here....

2. REFRESHING POMEGRANATE MOJITO

Another cocktail made with mint; this one is always a crowd favorite and is easy to mix in large batches when you have people over. Get the recipe here...

3. STRAWBERRY PEAR SANGRIA

Strawberries are coming into season and you can usually find quality pears year 'round. This is one of those go-to recipes you will find yourself serving again and again. And because you can change out the fruit for whatever is in season, you can keep it on the menu all summer long. Get the recipe here...

4. MOSCOW MULE

Long a favorite of mine, Oprah declared it her favorite cocktail a while back and now everyone is discovering it. If you can get the copper mugs, it just seems to taste better but if you don't have those, a mint julep or pewter mug will do the trick. The secret is Ginger. So zingy and so refreshing! Get the recipe...

Wednesday
Mar122014

Cooking with the Kids: Martie and CCA Chefs Club Huntsville

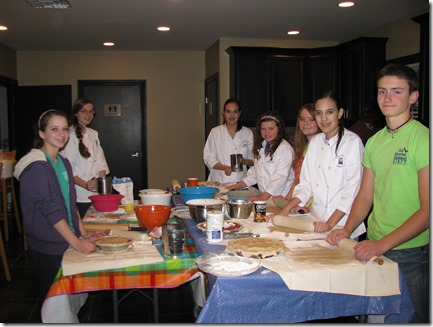
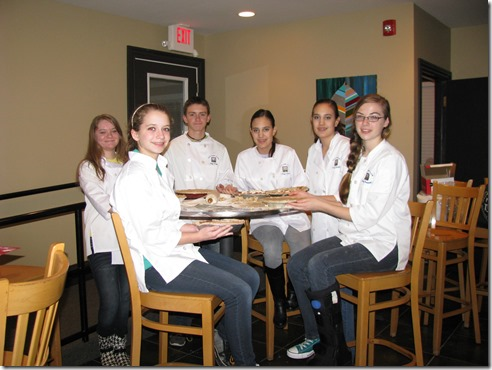
I have the great honor of working with many different groups and one of my favorites is the CCA Chef's Club from Huntsville, Alabama. The group is comprised of junior high and high school students who have a love of cooking and may possibly want to seek a career in food one day. I've had the chance to hang out with the kids a number of times; we cooked together last holiday season and made my chocolate roulage recipe. Last year, some of them were able to come to Birmingham for a tour of the Southern Living campus, the legendary test kitchens and the studios where I film my videos for MyRecipes.com


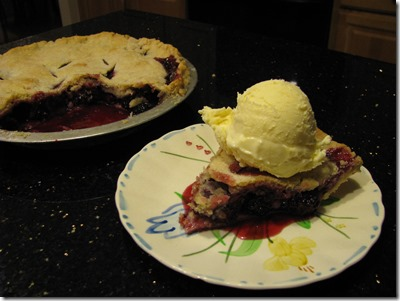
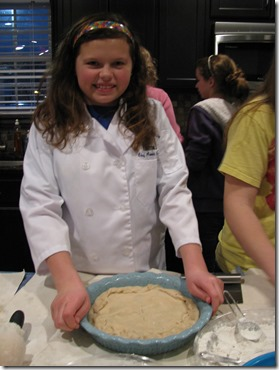
I asked the group for a family traditions recipe and they selected this old school whip pie crust recipe to share. Filled with fresh blackberries or your favorite fruit filling, try it for yourself. Here are some photos of the kids with their own variations. The pie crust recipe calls for items I've never even heard of: a pie crust cloth and a rolling pin cover. I guess that just shows how old school it this recipe really is. If you do not have these items, just make the substitutions I've indicated.

CCA Chef TIP:  The use of a pastry cloth and rolling pin cover helps keep the pie crust from absorbing too much flour when rolling it out.  Too much flour and too much handling make a tough pie crust.

WATER WHIP PIE CRUST

(Recipe for 9” two-crust pie)

3/4 cup Crisco
1/4 cup boiling water
1 tablespoon milk
2 cups all-purpose flour (sifted once before measuring)
1 teaspoon salt

Put 3/4 cup Crisco in a mixing bowl.  Add 1/4 cup boiling water and 1 tablespoon milk; whip with a fork until water and milk are incorporated into the Crisco.  It should be smooth and thick like whipped cream.  Sift in 2 cups sifted all purpose flour and 1 teaspoon salt. Stir quickly, with round-the-bowl strokes, into a dough that “cleans” bowl.  Take up dough in hands and work gently into a smooth, blended round. Handle dough as little as possible.  Divide dough in half; roll each half separately. Place one half of the dough onto a lightly floured pastry cloth. (ok to use floured plastic wrap) Using a rolling pin with cover, (ok to simply flour the rolling pin) roll out the bottom pie crust.  Once dough has been rolled out, use the edge of your pastry cloth to carefully raise dough up and over the rolling pin.  This will make it easier to transfer rolled dough to the pie tin.  Fill the bottom crust with desired filling.  Roll out second half of dough and place on top of pie filling.  Trim dough ½ inch beyond pan, and flute edge.  Make several slits in top of pie crust for steam vents and sprinkle with sugar.  (Sprinkle with sugar and cinnamon if making an apple pie.)  Baking temperatures and times depends on the filling you have placed inside.

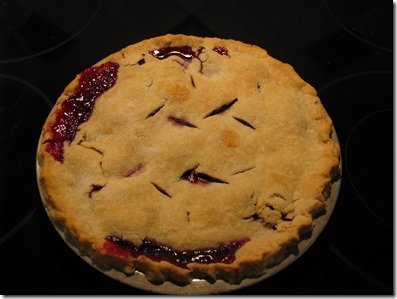
Blackberry Pie frpm CCA Chefs Club HuntsvilleFresh Blackberry Pie Filling

3 cups fresh blackberries rinsed and drained

4 tablespoons All-Purpose flour

1 cup sugar plus more to sprinkle on top of crust

4-5 tablespoons water

1 tablespoon unsalted butter 

Place blackberries in bottom pie crust.  Layer the remaining ingredients.  Cover filling with top pie crust; seal and flute edge. Make several slits in top to allow the steam to escape. Sprinkle top with sugar.  Bake at 450 degrees for 10 minutes then reduce heat to 350 degrees for 40-50 minutes.  Cool on cooling rack for 2 hours before serving.

Thanks to all of my sweet future chefs for providing us with the recipe and photos of all the fun! Hope to see you all again soon.